Creating tables
This guide explains how to enable and create tables in the Merchant App, enabling you to manage dine-in orders efficiently.
Prerequisites
- You are logged into the Merchant App with Edit access to Settings / Table Management.
- (Optional) To enable table-based pricing (e.g., separate prices for AC and Non-AC dining), you must create multiple order types and configure products with multiple prices.
Refer to Multi-price product creation.
Step 1: Open Table settings
- From the main navigation bar, go to Settings → Store.
- Search for Tables in the Store settings page.
- Enable the Tables option.
- Click the Table option which is now available in the main navigation bar.
Step 2: Add a new table
-
Click Table from the main navigation bar.
-
Click the Create Table button.
-
A Create Table form or dialog opens.
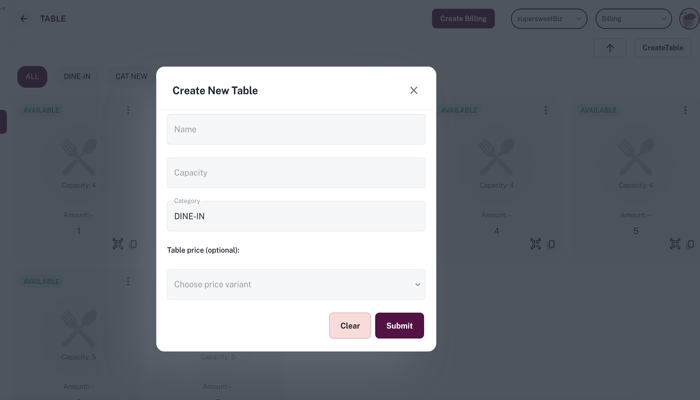
Step 3: Enter table details
In the Table form, fill in:
- Table Name / No: Enter a unique identifier (for example, T1, T2, Garden-1).
- Capacity: Enter the number of guests this table can accommodate (for example, 4, 6).
- Category: Select the category (default is DINE-IN). You can create custom categories (for example, AC, Non-AC, Rooftop).
Step 4: Configure table price (optional)
Choose the price variant that this table belongs to. This field is optional and can be left blank if standard pricing applies.
Step 5: Save the table
- Review the table name, capacity, and category.
- Click Submit to create the table.
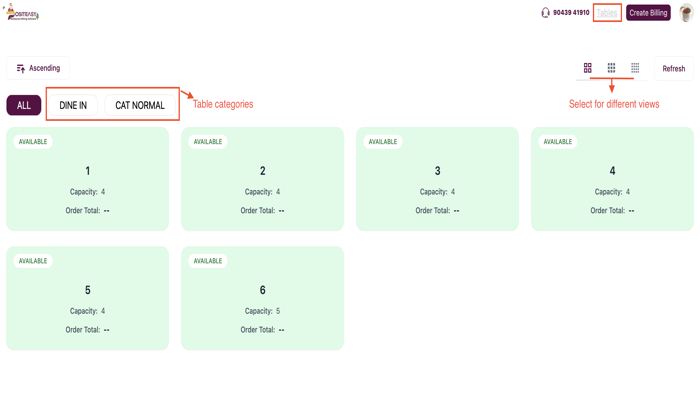
Step 6: Verify in Staff App
-
Refresh and sync the Staff App.
-
Verify that the new table (for example, T1) appears under the Tables section.