Setting up a Printer in the POSItEasy Staff App
Configuring a printer in POSItEasy Staff involves a straightforward two-step process to ensure your receipts and Kitchen Order Tickets (KOT) are printed to the right destinations.
Follow the steps below to create a printer profile and route it correctly.
Step 1: Creating a Printer Profile
The first step is to declare your printer in the settings so the system recognizes it.
-
Navigate to Printer Profiles:
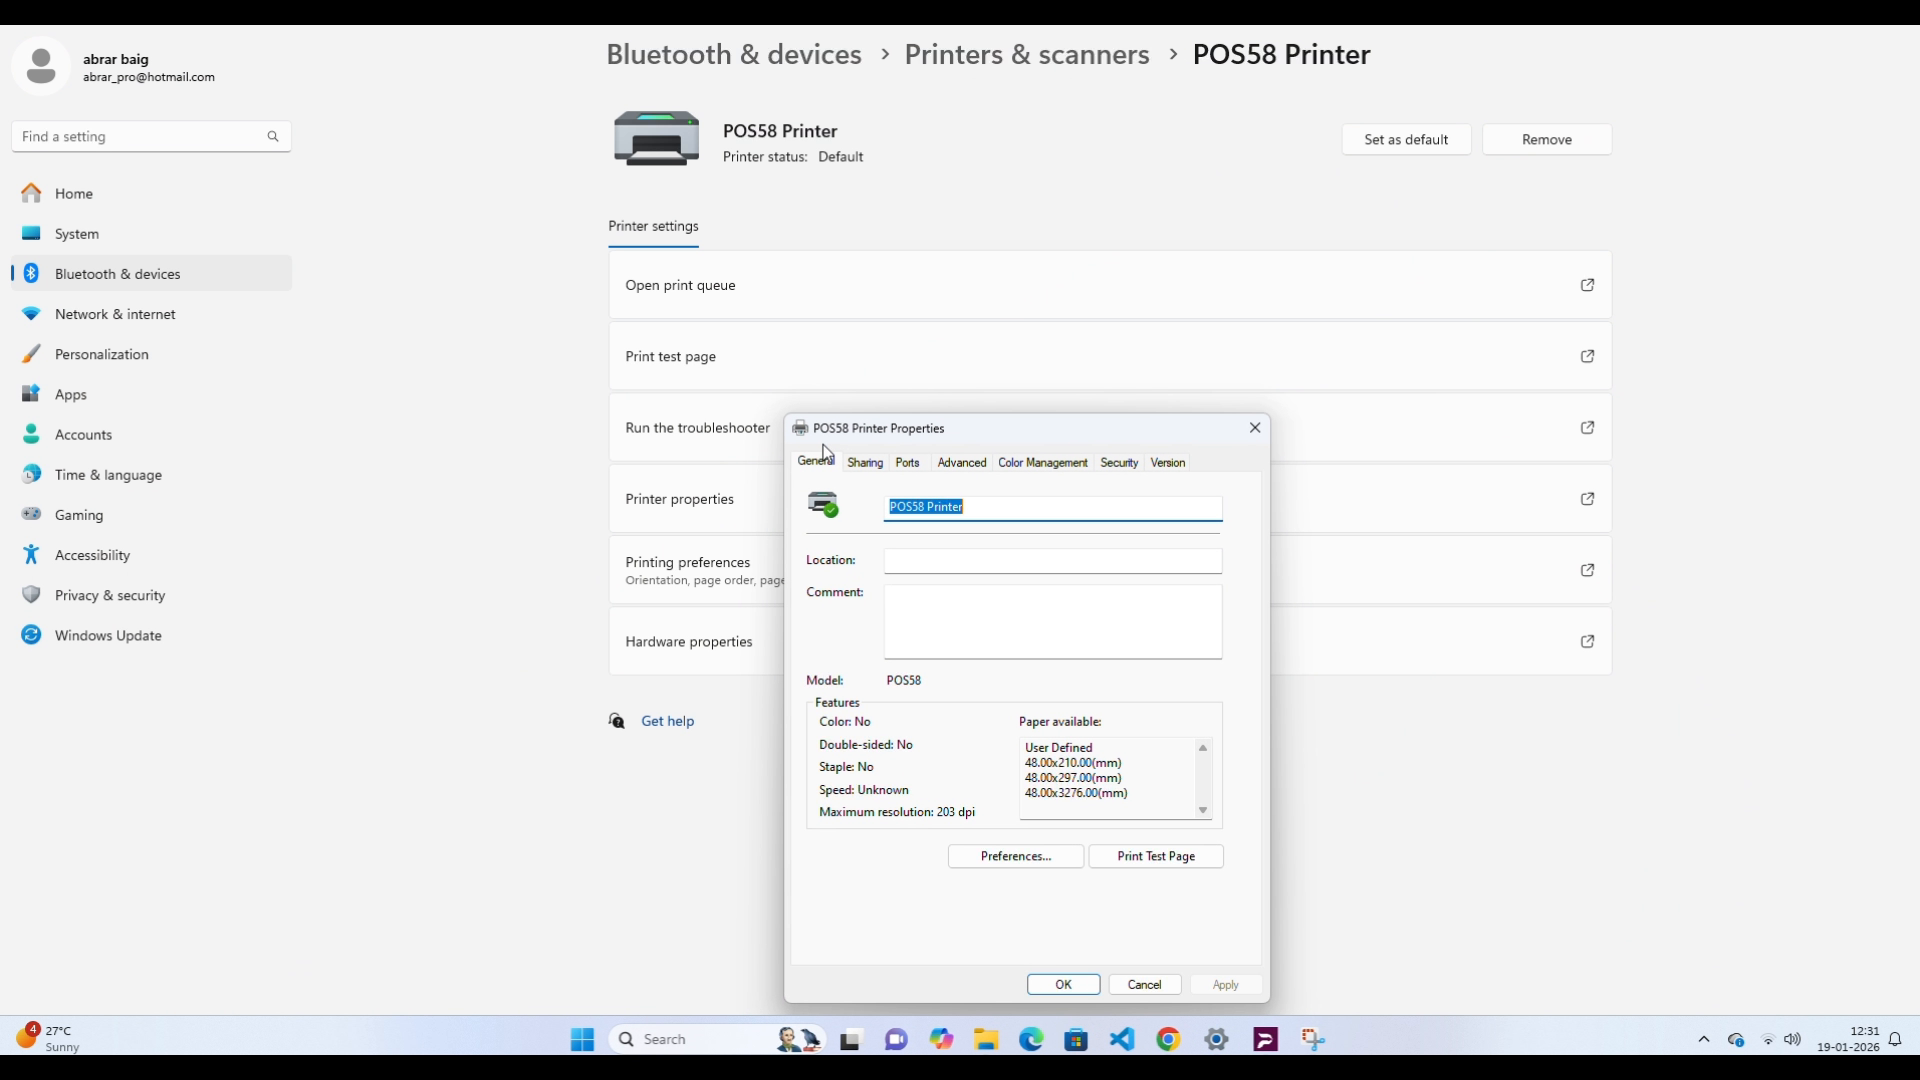
- Go to your POS menu and click on Settings.
- Navigate to the Printer Profiles section.
- 💻 Desktop View
- 📱 Mobile View
Printer Profile.
-
Add a New Printer:
- Click the Add New Printer button in the top right.
-
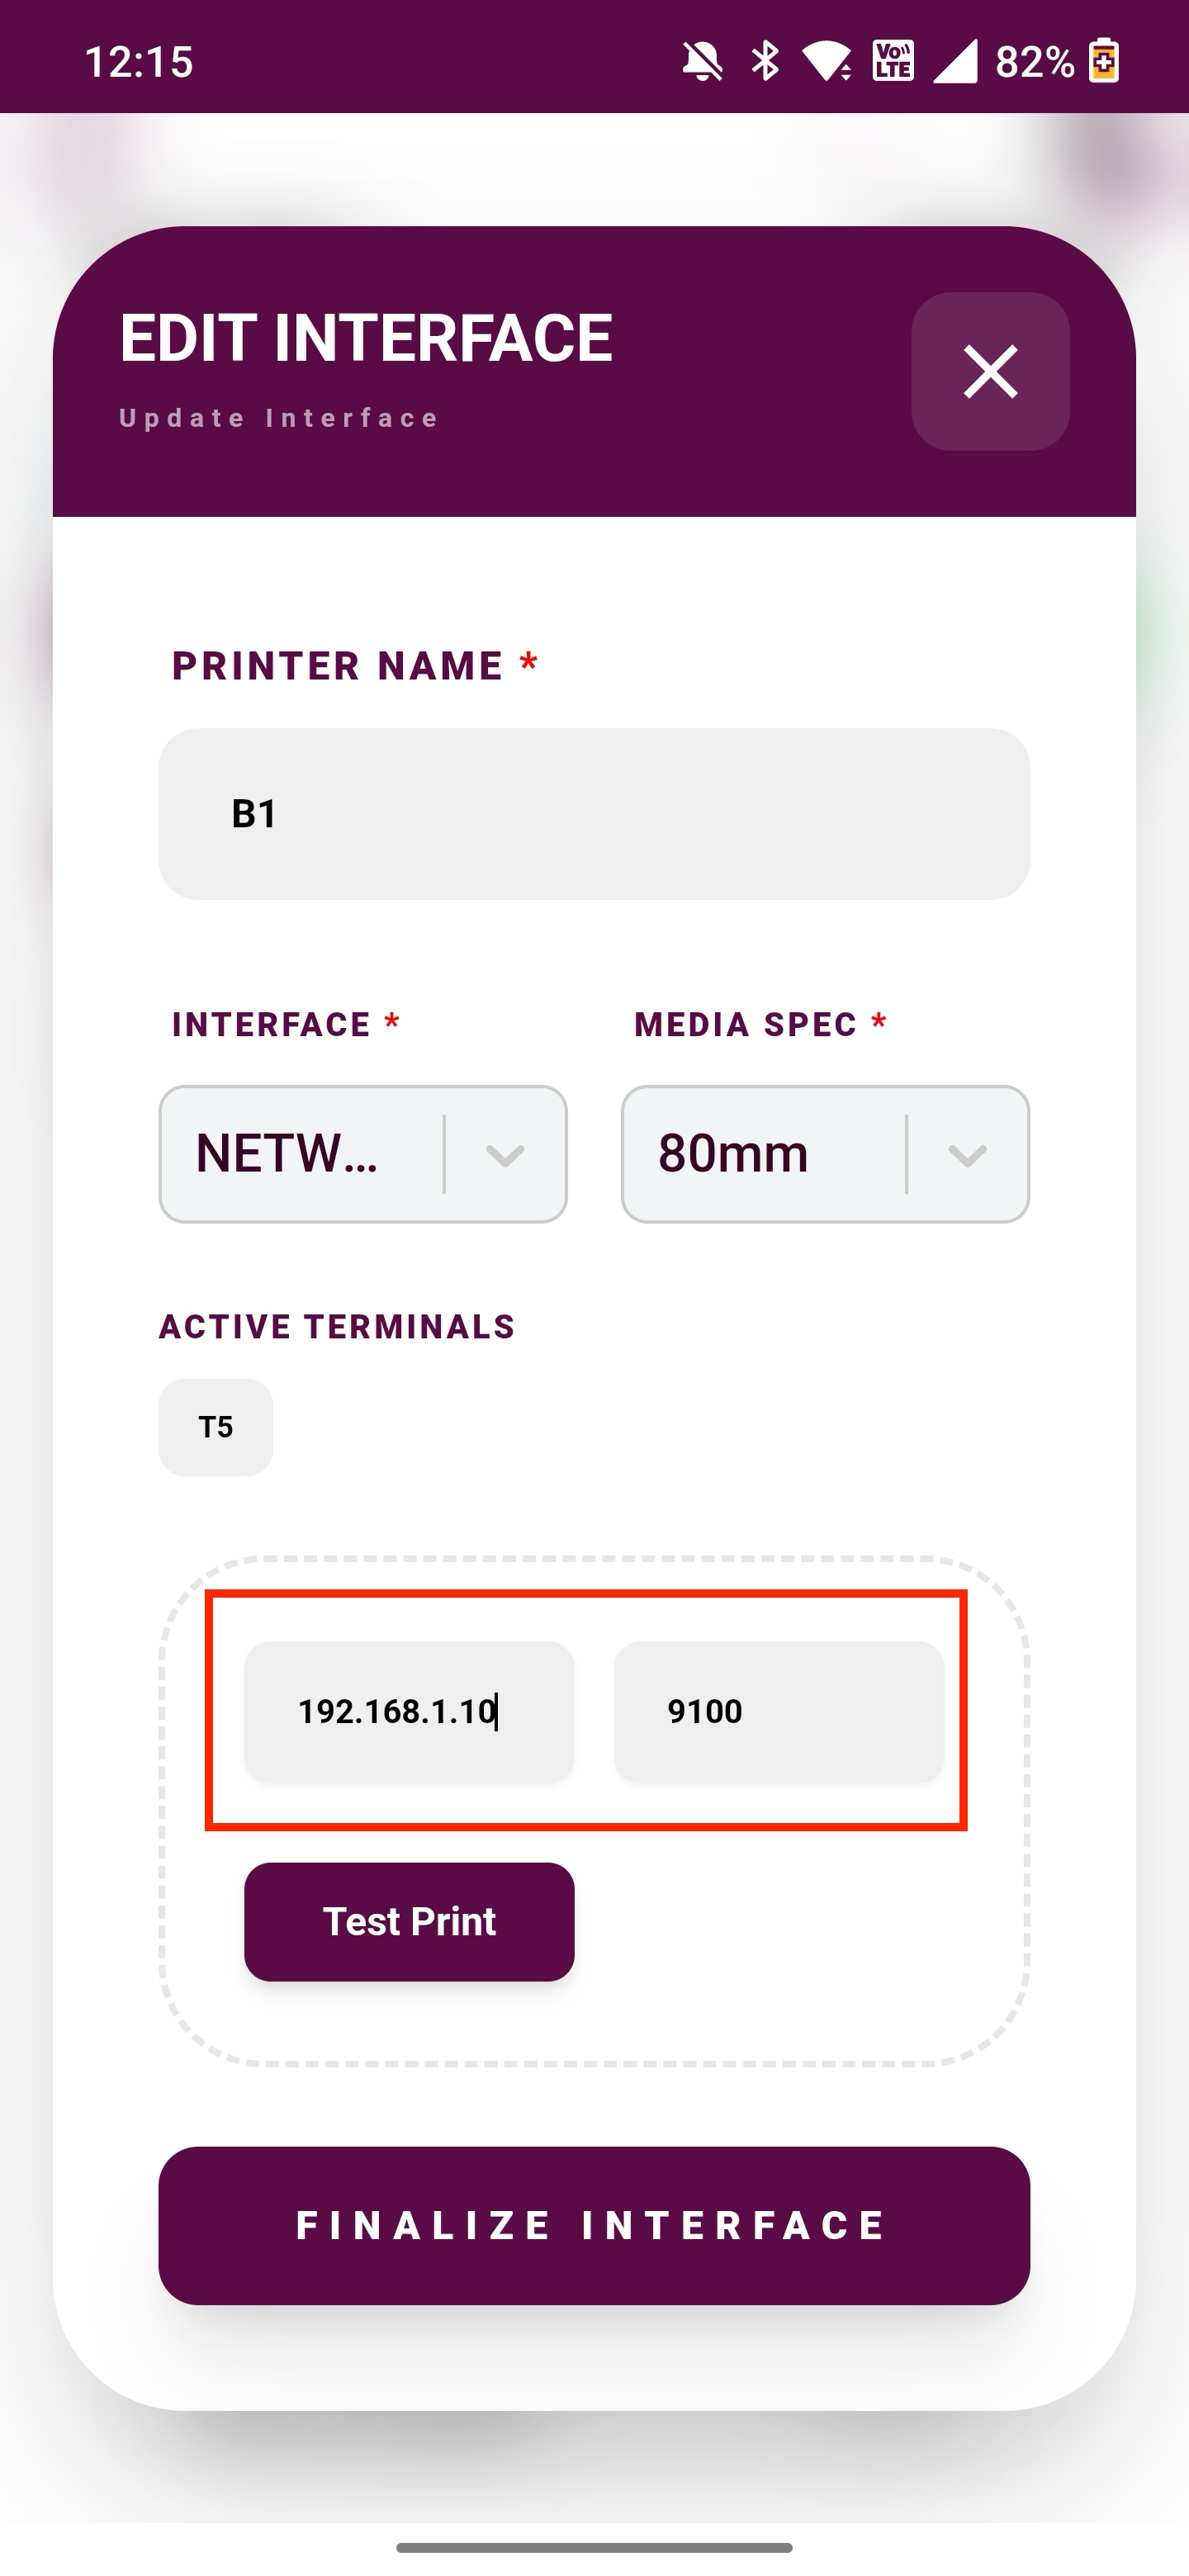
Configure the Printer Settings:
- Fill out the necessary details in the form.
- Printer Name: Give your printer a recognizable name (e.g., "Kitchen Counter Printer" or "Main Billing Printer").
For USB printer in windows. It is necessary to give the exact windows printer name from the printer settings. Refer Install a USB printer on Windows.
-
Interface Type: Choose how the printer connects:
a) USB
b) Network (LAN/WiFi): Enter the printer's Host IP Address and Port (default is usually
9100for port).
c) Bluetooth: Select the desired printer.
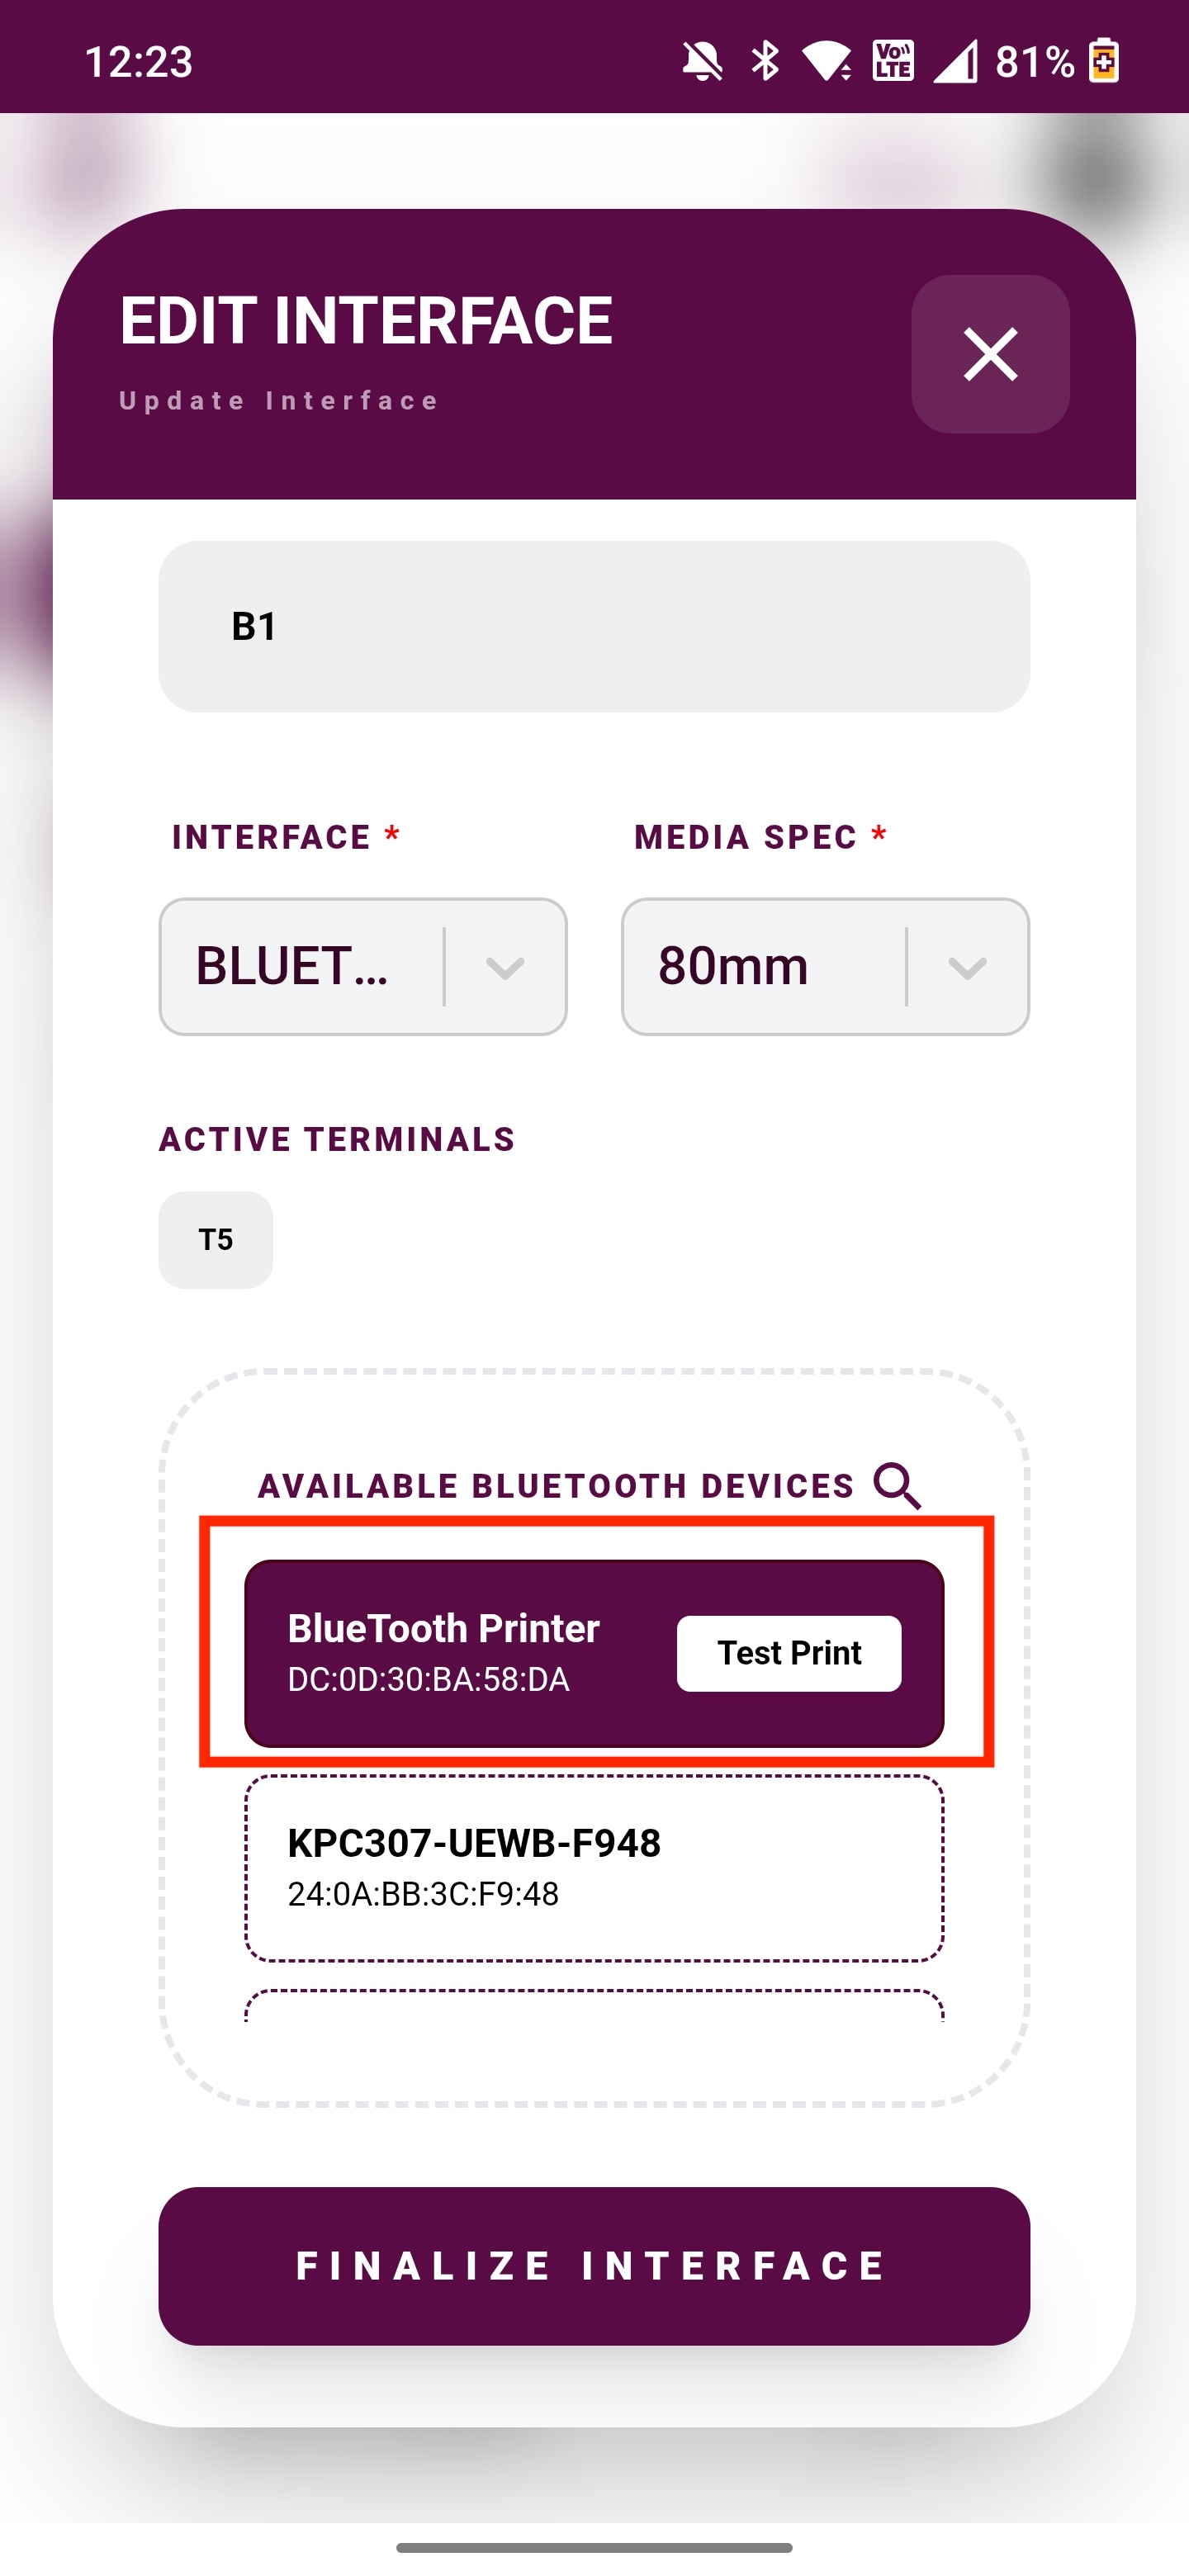
The bluetooth printer should be already paired with your android device to be visible in the list of available bluetooth devices. Refer Connect bluetooth printer (android).
d) Pinelabs: Specifically for integrated EDC printers.
- Paper Width: Select your receipt paper width (usually
58mmor80mm). - Enter your preferred print Left and/or Right Margins (optional and only available for windows).
- Save:
- (Optional) Use the test print button to verify connectivity.
- Click Save to create the profile. It will now appear inside your Printer Profiles grid indicating its connection status.
- 💻 Desktop View
- 📱 Mobile View
Printer Profile Creation.
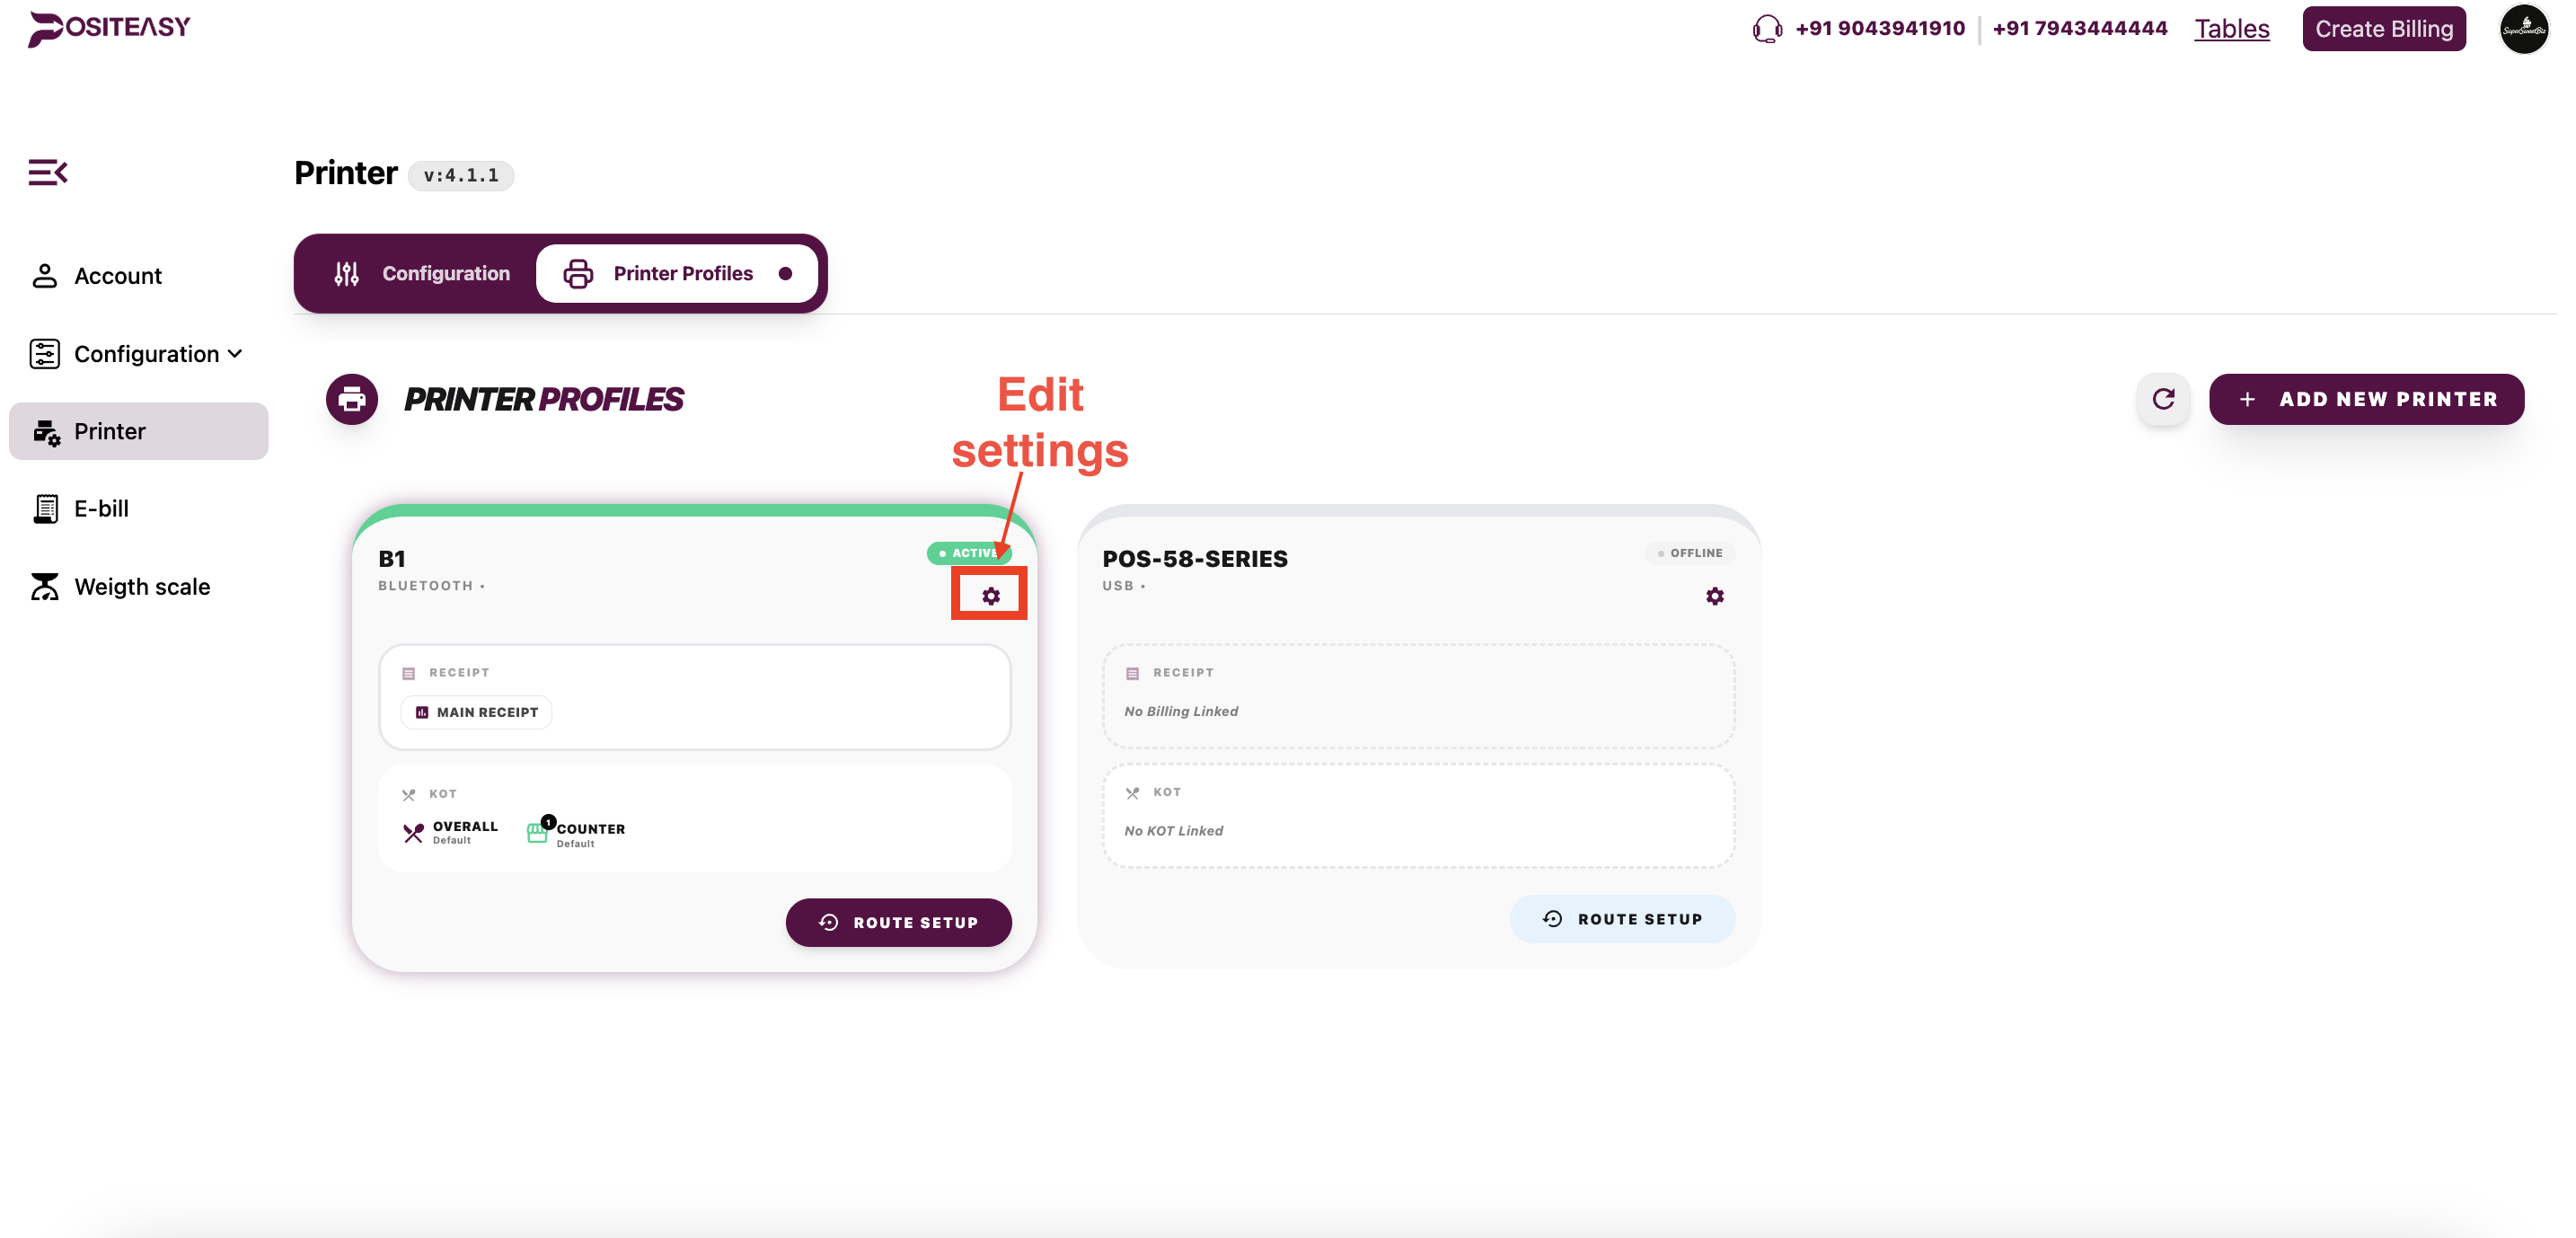
Edit Printer Profile
You can edit the created printer profile by clicking the settings icon in the printer profile card and make the necessary changes.
Step 2: Route Setup
Once your printer is connected, you must "route" it by defining what documents (bills, KOTs) should be printed from it.
- Locate your Printer:
- Within the Printer Profiles screen, locate the newly created printer card.
- Open Route Setup:
- On the bottom right of the printer card, click the Route Setup button to open the printer mapping menu.
- Assign Billing Roles:
- Choose which type of receipt generation should be routed to this printer:
- Main Receipt: Assign this if the printer will be used at the front desk for customer billing.
- Online Receipt: Assign this if you want online order receipts routing here.
- Choose which type of receipt generation should be routed to this printer:
- Assign KOT (Kitchen Tickets) Roles:
- Check the boxes for the relevant Kitchen Order mapping:
- Overall KOT: Best for a centralized master kitchen or expo ticket printer.
- Counter KOT: If your kitchen has multiple counters (e.g., Drinks, Grill), enable this and select which specific Linked Counters should send tickets to this printer.
- Check the boxes for the relevant Kitchen Order mapping:
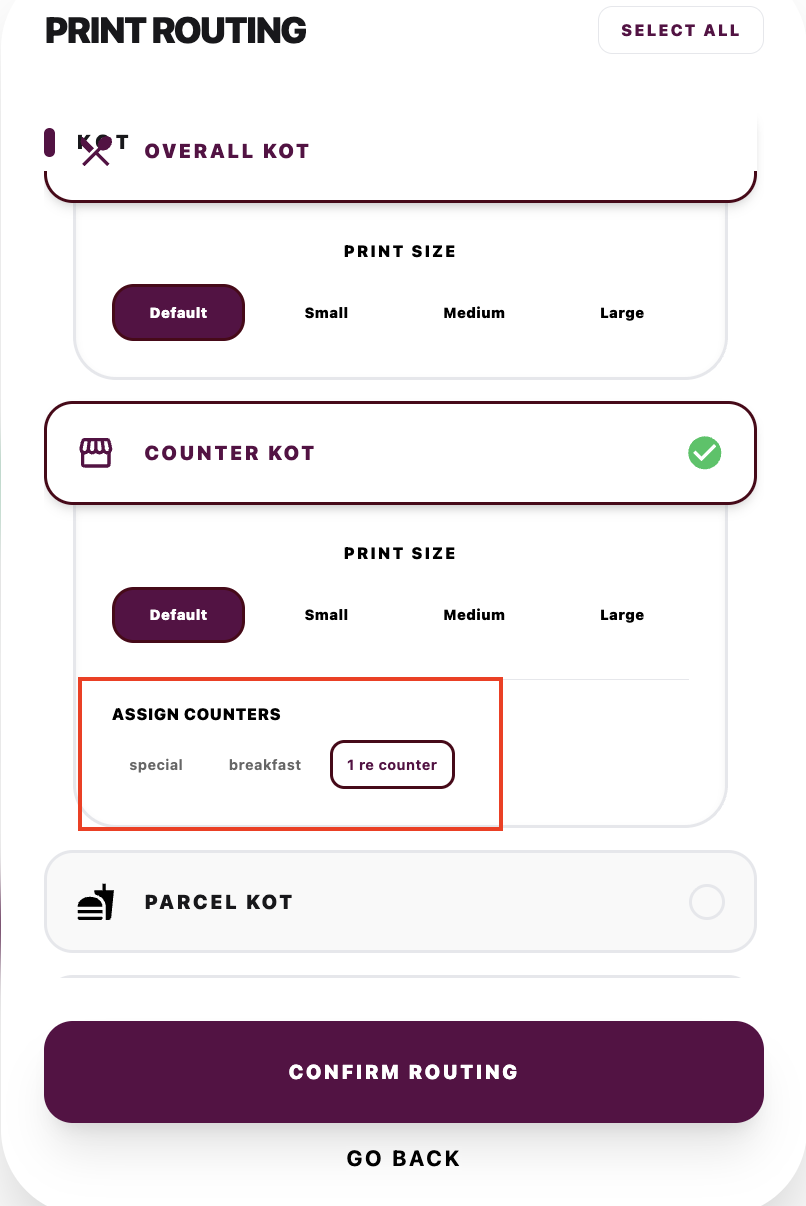
- Parcel KOT: Assign this if the printer is dedicated to printing packaging rules for takeout orders.
- Online KOT: Enable for kitchen stations meant to fulfill online orders (Only for Swiggy/Zomato).
- Save Operations:
- After routing your roles, click Confirm routing at the bottom of the dialog.
- Your Printer Profile should now show an Active status indicator along with icons displaying its linked roles! You are now fully configured to print.
For a given terminal, you cannot assign the same route (e.g., Main Receipt) to two printer profiles. You will get an error : This print category is already assigned to another profile :Main Receipt